One of the ways that your AggData can be used is to create mailing labels. The following instructions will guide you through the process of using your AggData to create mailing labels in Word .
Step One:
Open a blank Word document, and then find and open the Mailings tab.

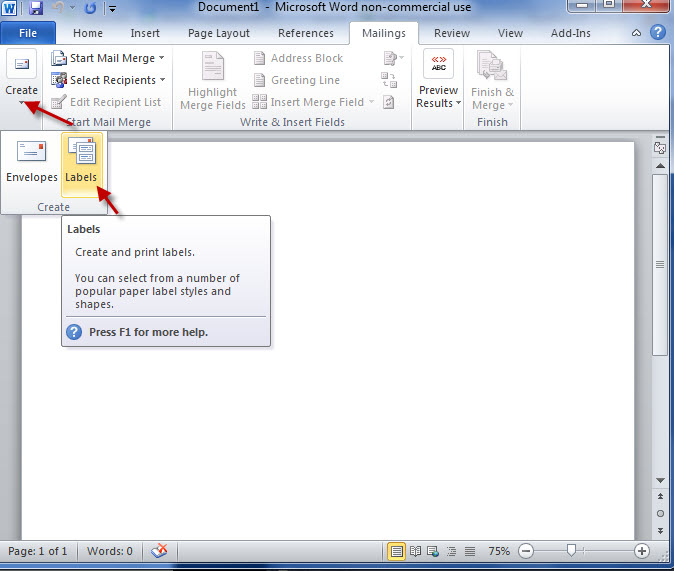
Step Two:
Click on the Create button and then click on Labels from the menu.
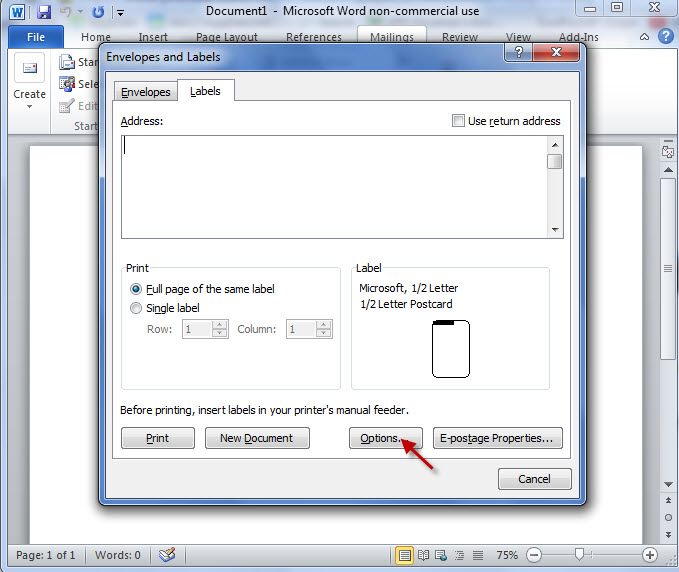
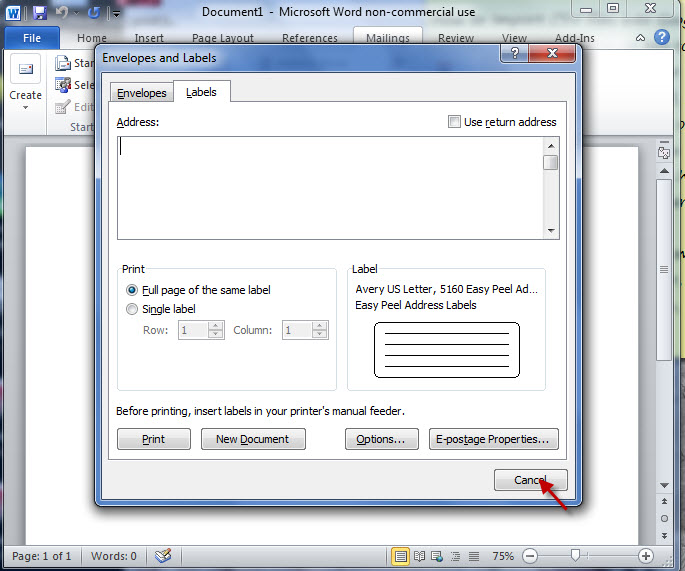
Step Three:
Click on Options from the window that opens.
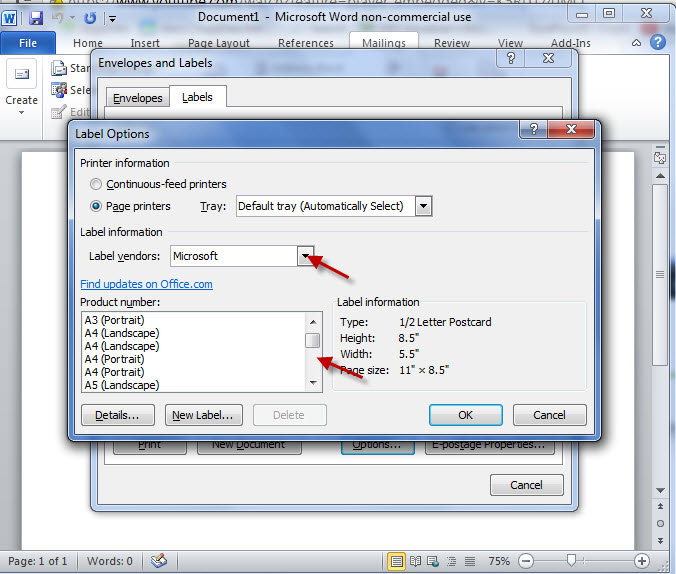
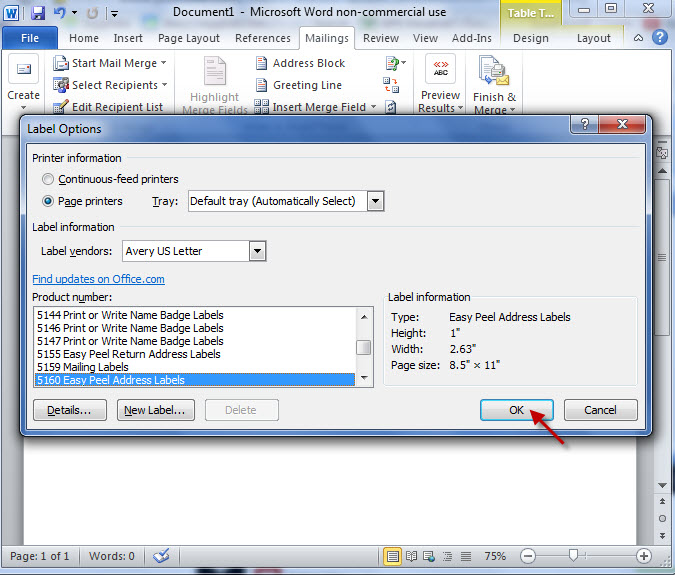
Step Four:
The Label Options window will open. Note the Label Vendor and Product Number locations. Select the Label Vendor from the pull down menu, and then select the correct product number.
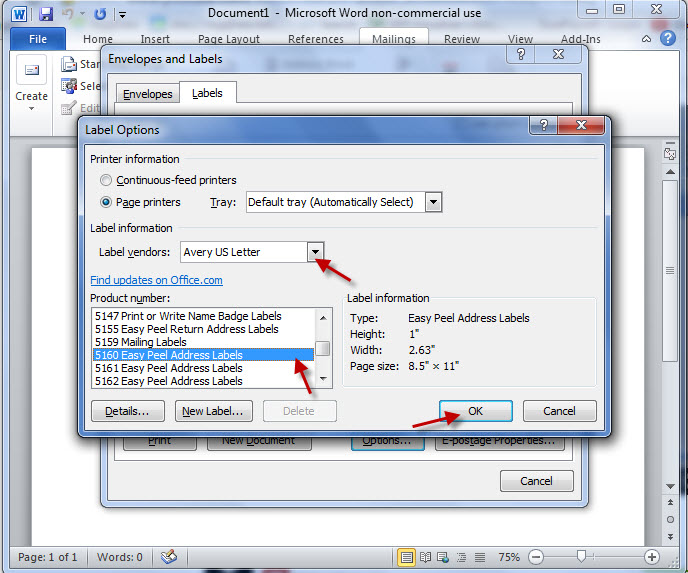
Step Five:
Once you have made your selections click on OK. This will set the default for your labels.
Step Six:
Simply click Cancel to return to the Word document.
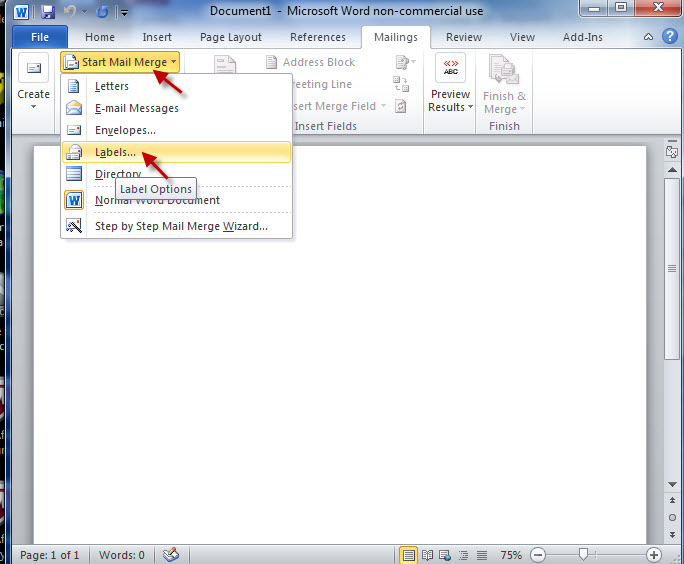
Step Seven:
Select Start Mail Merge, then click on Labels from the drop down menu.
Step Eight:
The Label Options menu will reopen, and the default settings you just completed should be in the window. Now click on OK to begin the labels.
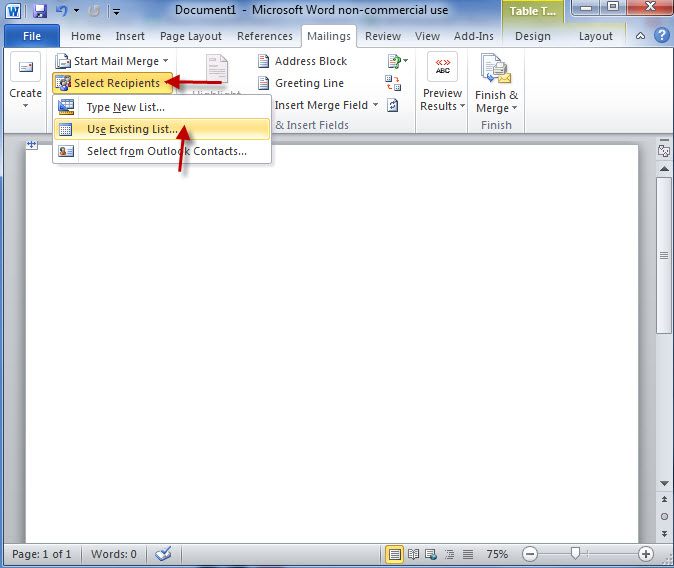
Step Nine:
Find and click on Select Recipients, then click on Use Existing List.
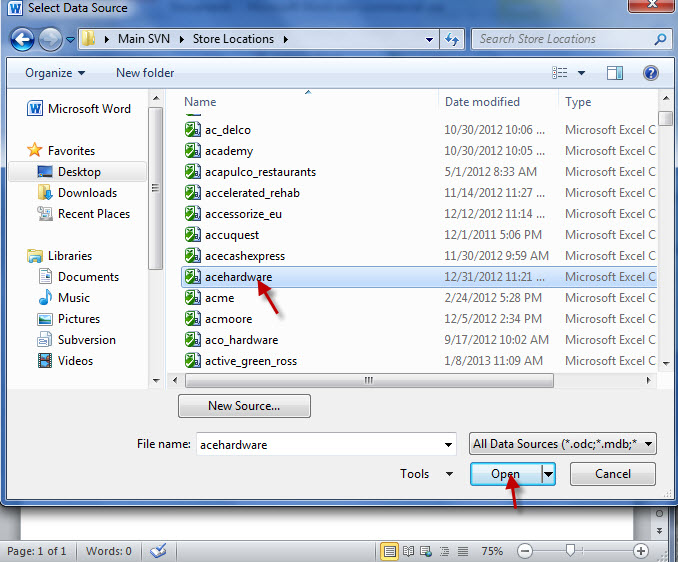
Step Ten:
Find the AggData in the location you have saved it, then click to Open the file.
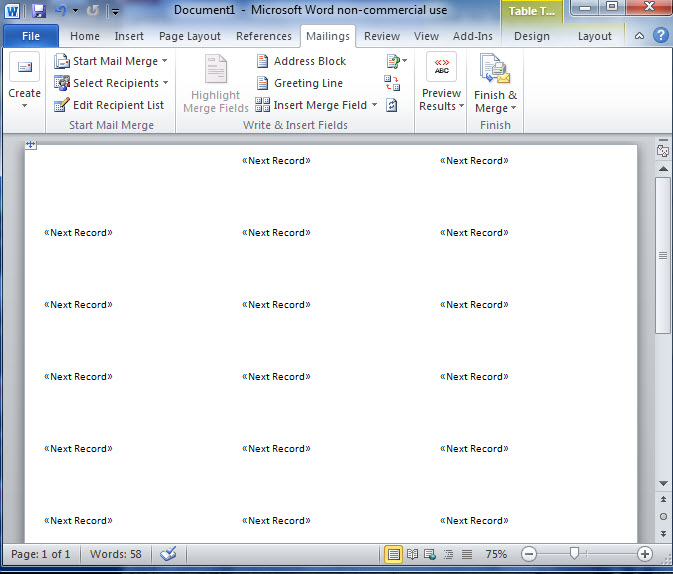
Step Eleven:
The document will open to show you where the labels will be located in the file.
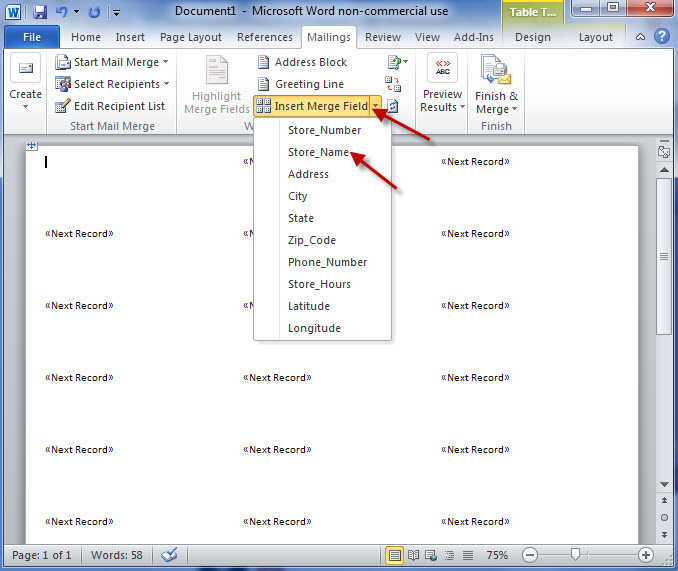
Step Twelve:
In order to choose the fields you would like the labels to include, click on Insert Merge Field. Select the fields you would like represented on each line of the label.
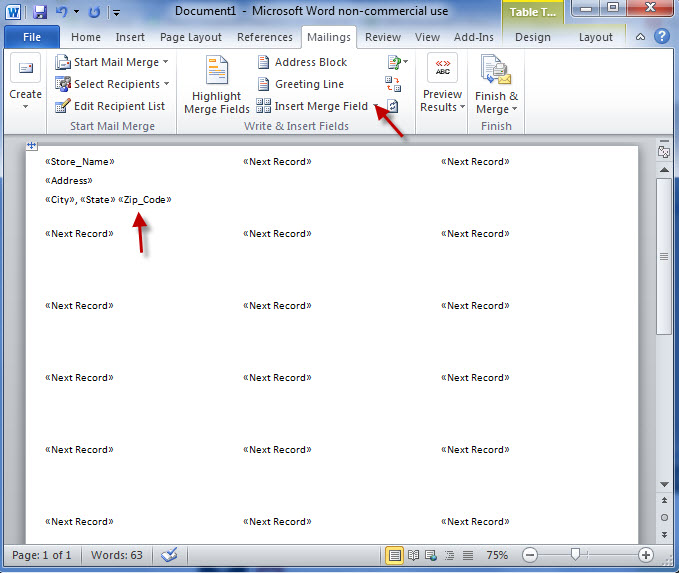
Step Thirteen:
Instructions for a basic label are as follows: select Store Name or Name for the top line, then hit return. On the second line go back to Insert Merge Field and select Address. On the third line select City (add a comma after it shows up on the label), then on the same line add State, and finally Zip Code.
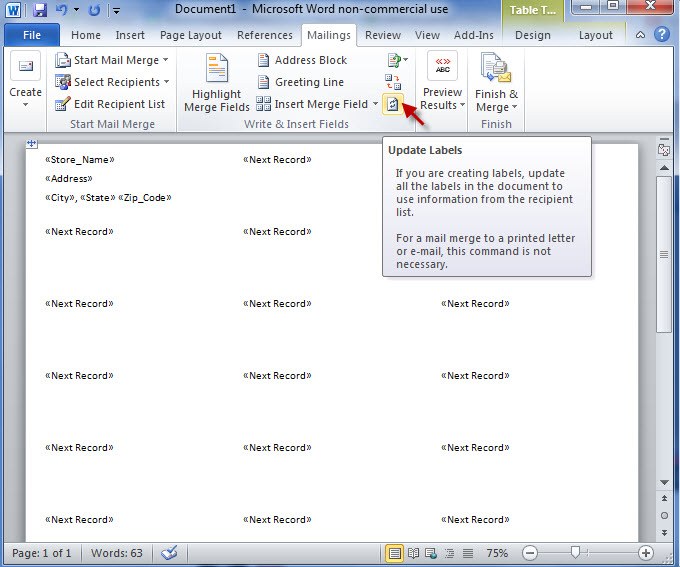
Step Fourteen:
Locate the Update Labels button at the top of the page and click it.
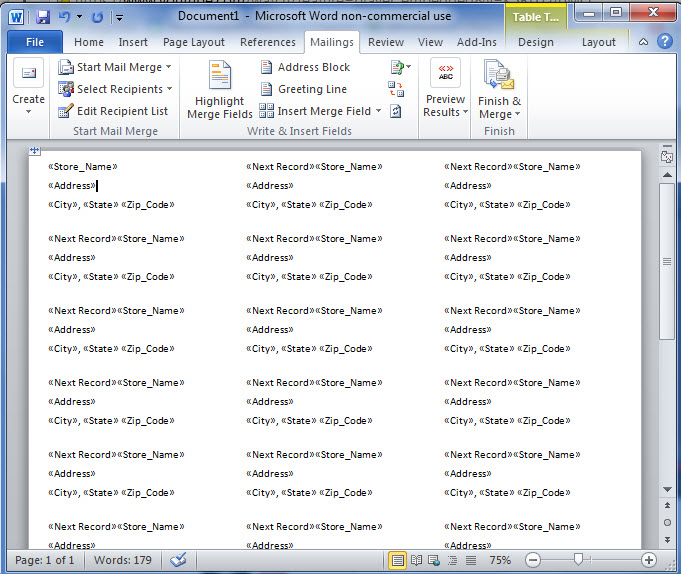
Step Fifteen:
Once you have used the update button, all the labels on the page will call for the same information as the first one you set up.
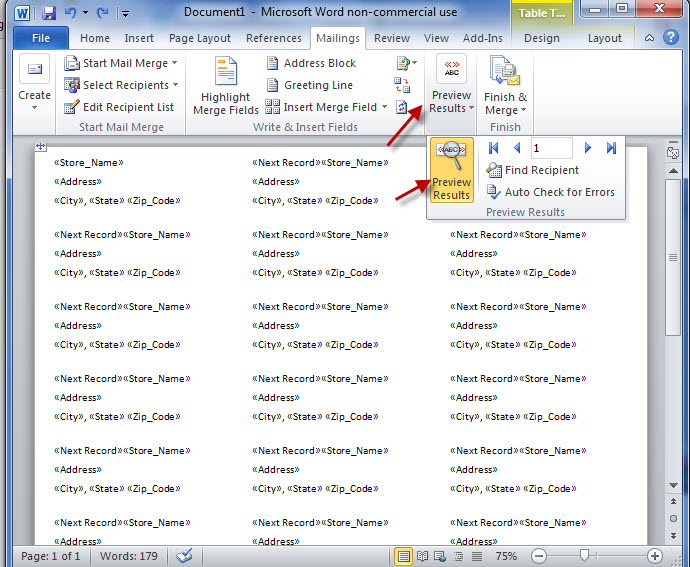
Step Sixteen:
Find the Preview Results button, and select Preview Results.
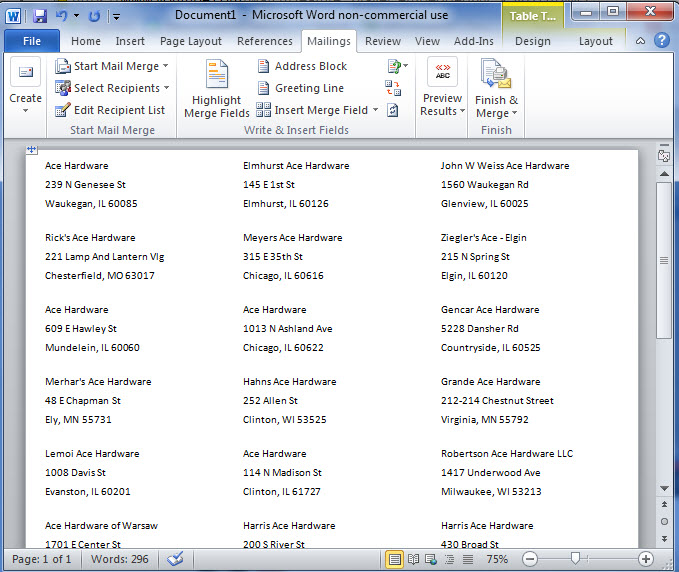
Step Seventeen:
Now the AggData will be viewable in the Word document labels.
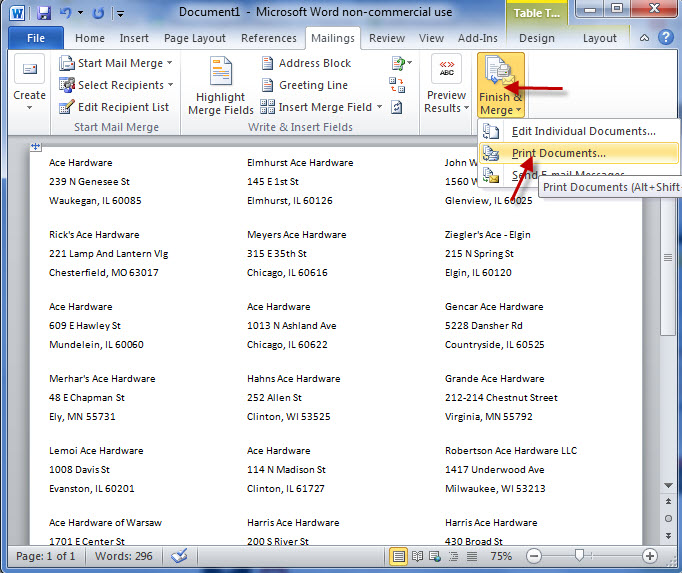
Step Eighteen:
In order to finish the labels and print them, find and select Finish and Merge from the top of the page. Click on Print Documents to have the labels sent to the printer.
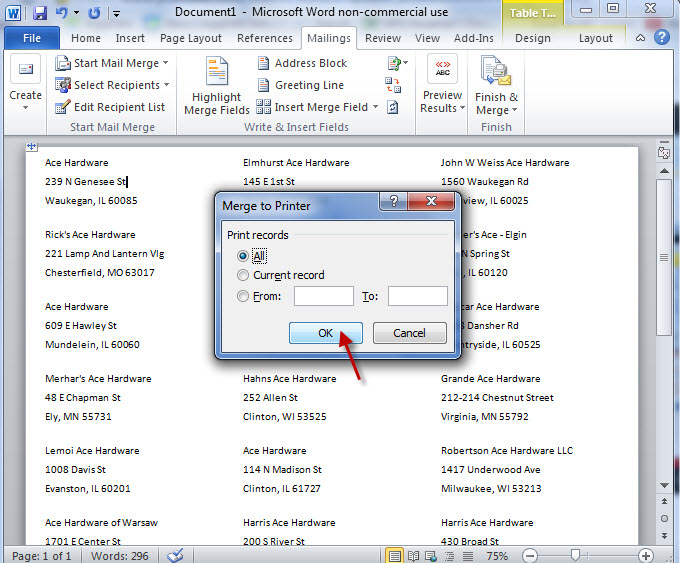
Step Nineteen:
Select All, and then click on OK to send the labels to the printer.
Congratulations, you can now successfully use AggData to create and print mailing labels.
